Set Up Testing
Now that you have Postman collection imported and local server ready to receive incoming requests. Let's create a closing at Snapdocs!
Set Collection Variable Values
First, update your collection variables to set the value for
- AuthBaseUrl
- BaseUrl
- ClientId
- ClientSecret
Above variables are for the purpose of authentication. You should be able to get them from the Snapdocs representative. Note, if you are testing from POS or TPS perspectives, you will receive two sets of credentials, one for the LOS collection, and the other one for POS or TPS.
Most likely you will also need to set
- external_system
- external_type
The external system is used by Snapdocs to identify parties involved in the closing. Please reach out to your Snapdocs representative to inquire the appropriate value.
Now let's test the Snapdocs Connect API!
Select the "Subscriptions" folder, then the "List subscriptions" request, click "Send" button. You should get the 2XX HTTP response code.
Authenticate with Snapdocs
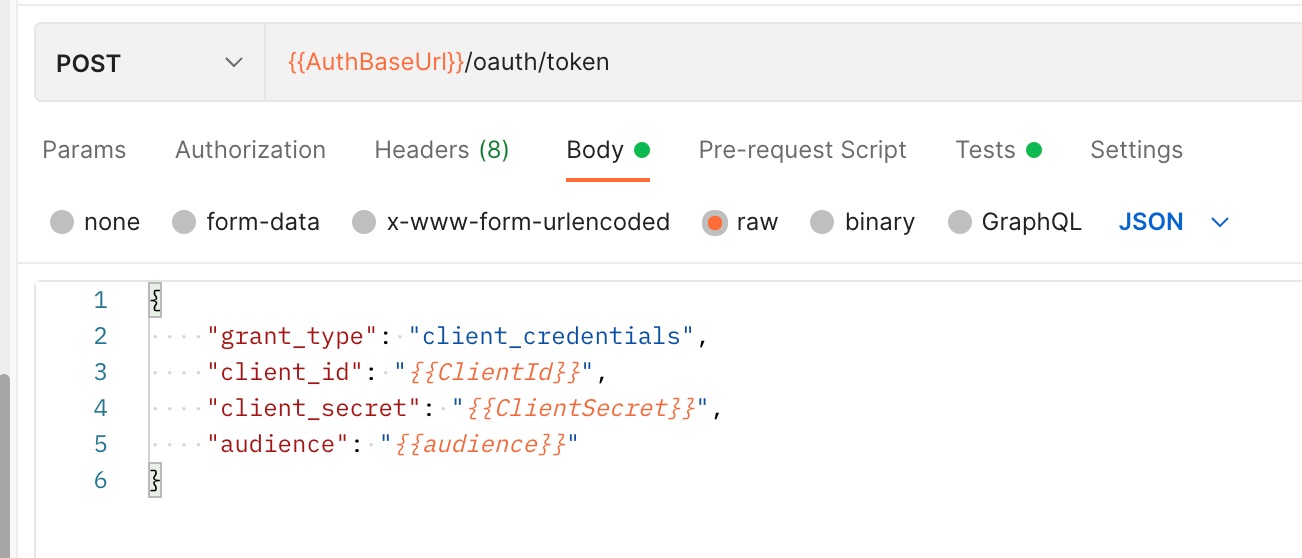
Select the Postman Collection for your use case, then choose "Get Token" request, click "Send" button.

Get-Access-Token Request
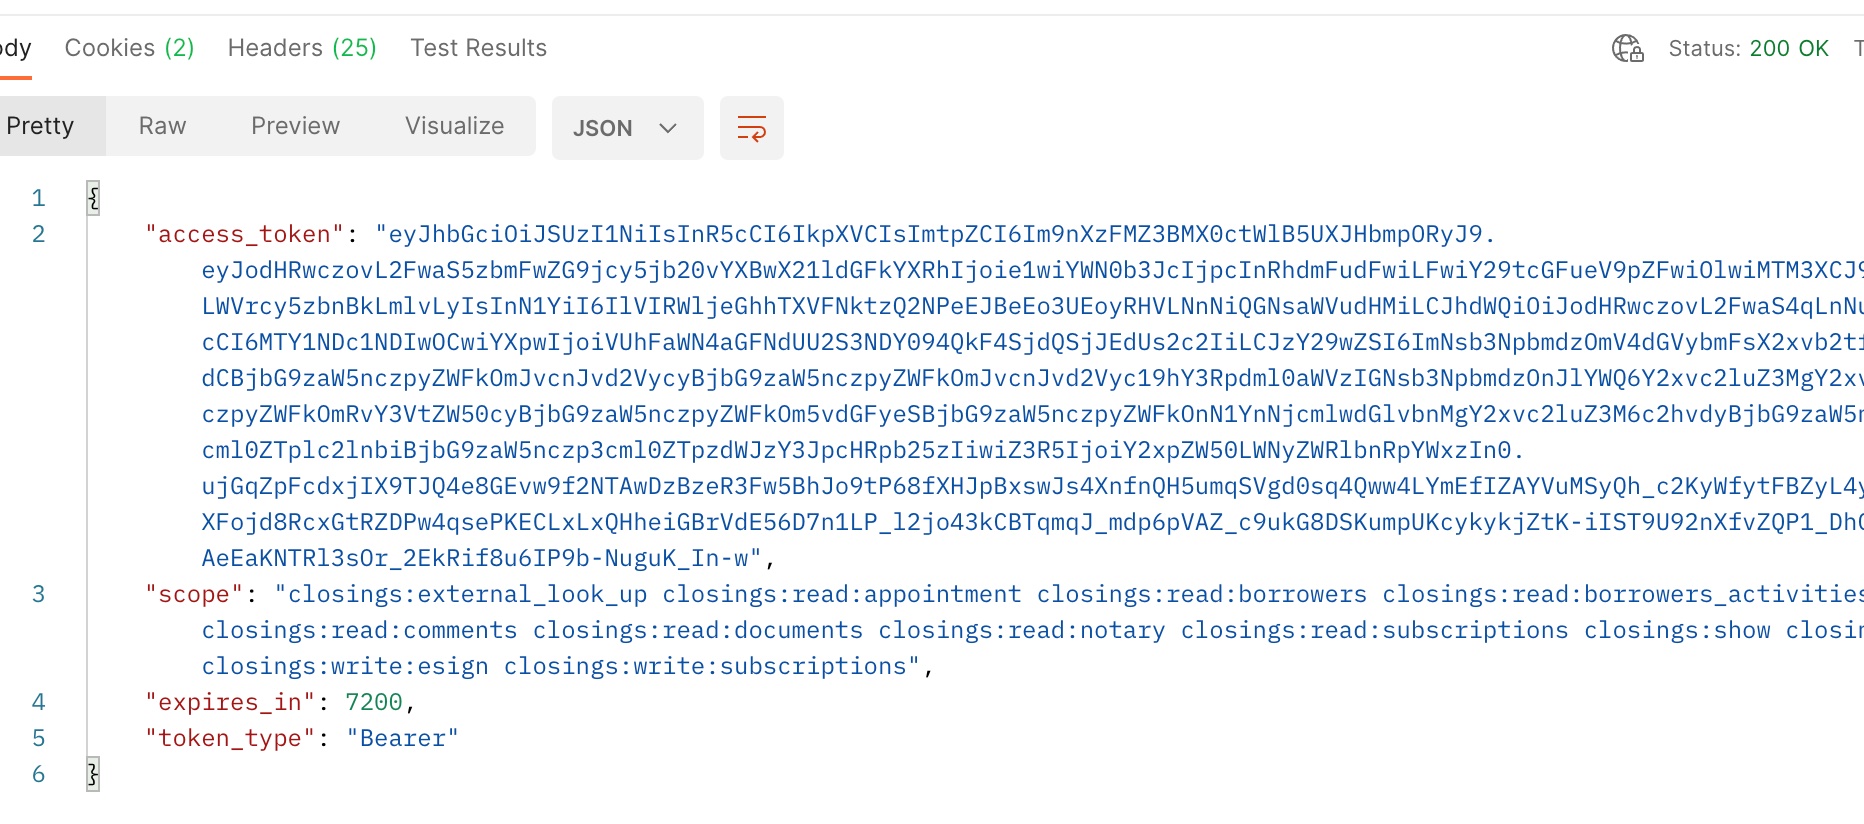
You should expect to see response like below

The “scope” are the permissions that are set up at Snapdocs for the particular client credential (identified by the client id and client secret). The token will be valid for 7200 seconds (2 hours).
Create Subscription
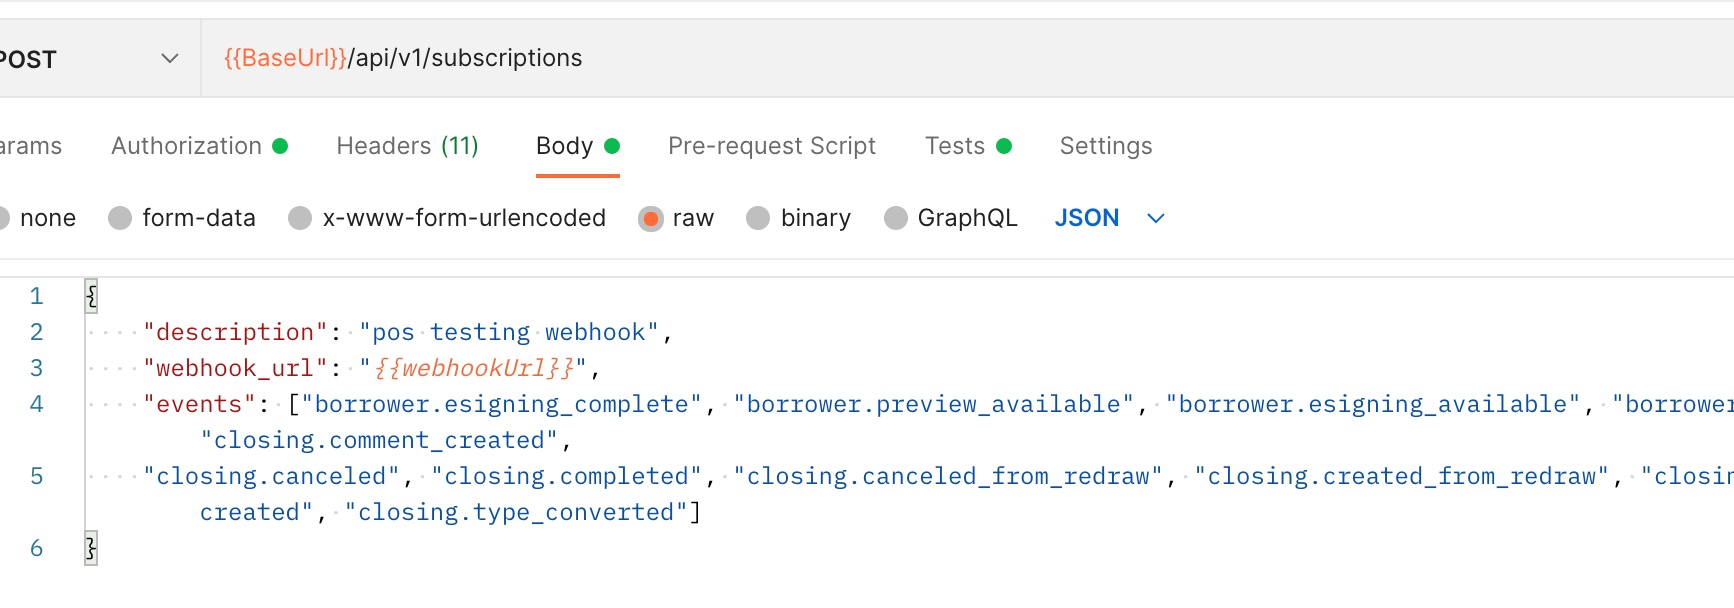
Next, we will create subscriptions to receive broadcasted events from Snapdocs Connect. Before making the create-subscription request, first set the "webhookUrl" collection variable value to the Ngrok url of your local JSON-server.
Select the "Create Subscription" request in the "Subscriptions" folder, and click "Send"

That is it! Now Snapdocs Connect will be able to broadcast those subscribed events to your local JSON-server when they happen to your closings.
Updated 9 months ago
