Create a Closing
Create closings with Snapdocs Connect
To create a closing with Snapdocs Connect, all lender systems must complete the following steps:
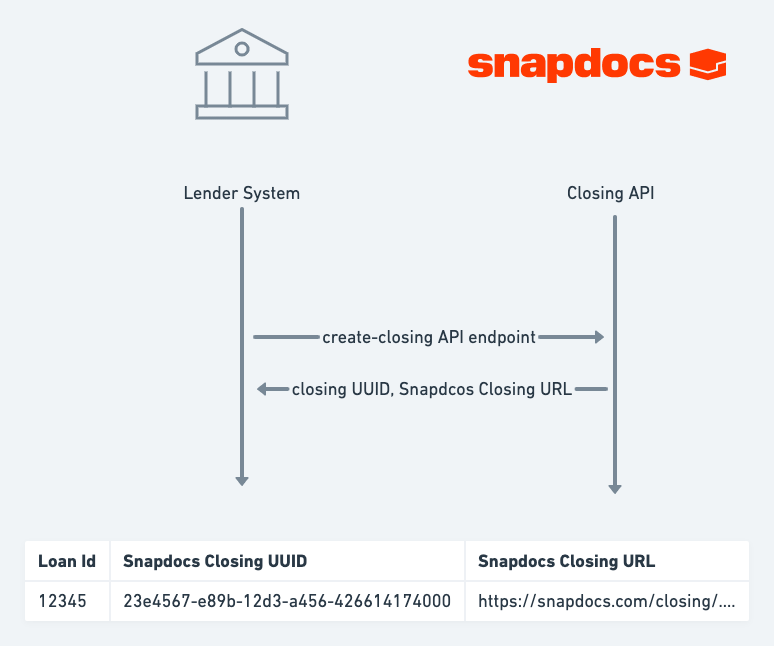
- Map your loan data and [create closing object] (ref:createclosing) at Snapdocs.
- Upload a new document signing to the closing.
- Submit documents so Snapdocs can begin processing the documents.
Here’s an example integration where you add the ability to create a closing in an LOS:
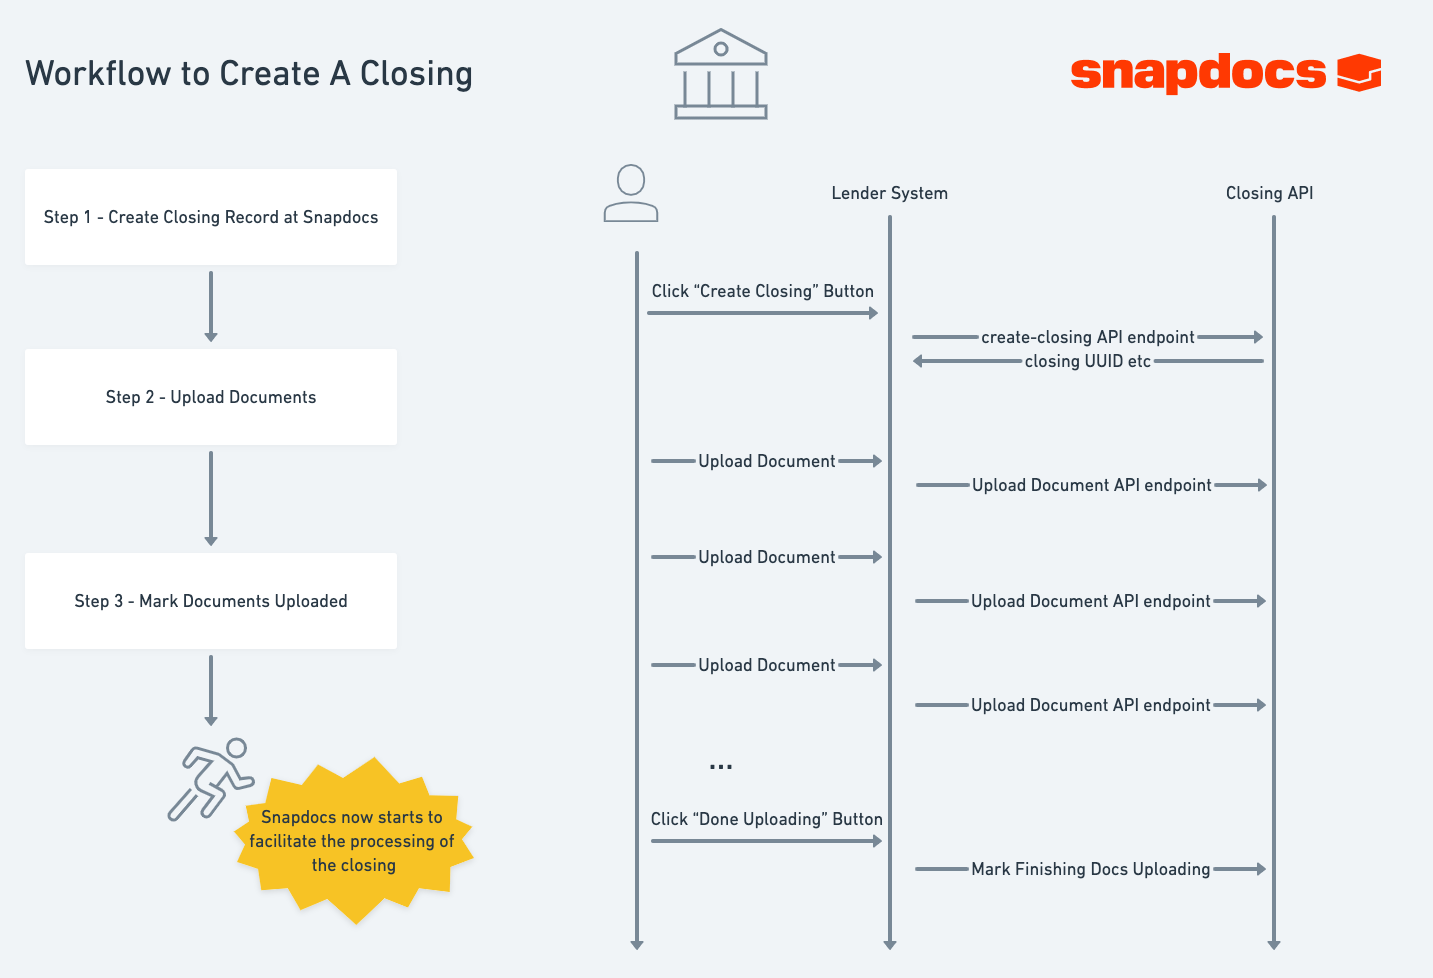
Steps to create a closing
Before sending request to Snapdocs to create closing, you will need to collect and map your loan data to Snapdocs Connect request fields.
Data mapping
Each integration will have to understand where on the existing loan do the closing fields exist. This must also take into account any lender by lender differences, if that mapping might not be the same source per lender. Snapdocs closings do not require a large amount of data, but will include the following fields (repeated for multiple borrowers, other parties)
- File number or system IDs (such as loan uuid, escrow id, etc.)
- Closing dates
- Signing method (wet, hybrid, hybrid with eNote, full eClosing, full eClosing with eNote)
- Lender connected team member(s)
- Settlement company / office / agent(s) and email addresses
- Property information
- Borrower / Signer details
In the case of fields with multiple sources, we have made the suggestion that a custom mapped field should be made, should be what the integration reads from, and then the calculation is put in the hands of each lender.
Out of the above fields, most will map from an existing loan field. However, signing_method will be a new custom field. We suggest building a calculation that makes loans as "e" as they can be, but we have also seen drop-downs or other manually set values.
Trigger
The initial sending of the closing to Snapdocs will happen at the time that a loan is ready to be closed and drawn documents are available to send. We suggest automating that trigger mechanism that will call the custom integration code to POST data and documents via Snapdocs Connect.
In this example, we'll walk you through the steps to embed a form and submission button to capture the required information for a closing, send the closing to Snapdocs, and make it ready for processing. Please refer to Create a new closing for the request and response details.
"Custom Loan" screens
We recommend having some custom screens on your LOS to display the following information about the integration.
- Data-mapped values that would be / were sent to Snapdocs, including any custom fields.
- Any action buttons for closings create or document redraw action.
- Closing status values of active closings.
-- Per loan on some loan details page.
-- Some list of active closings and current status that require Loan Officer action.
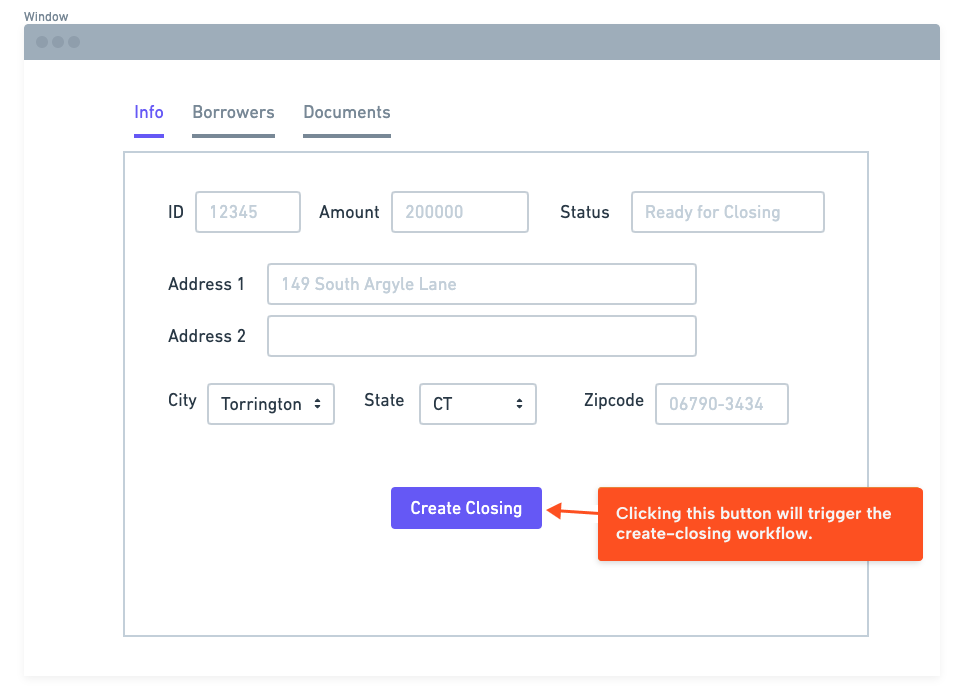
Build the "Closing Creation Experience" in your LOS
a. Capture required information for the closings (e.g., file number/system ID, signing method, settlement office details, closer's details, borrower's details, etc.) Reference the closing create endpoint for the required fields.
b. Embed a Create Closing button that is available after the user enters all required information.
c. Set up a webhook to capture closing statuses and show the information in your UI.
See more in the Subscriptions reference.
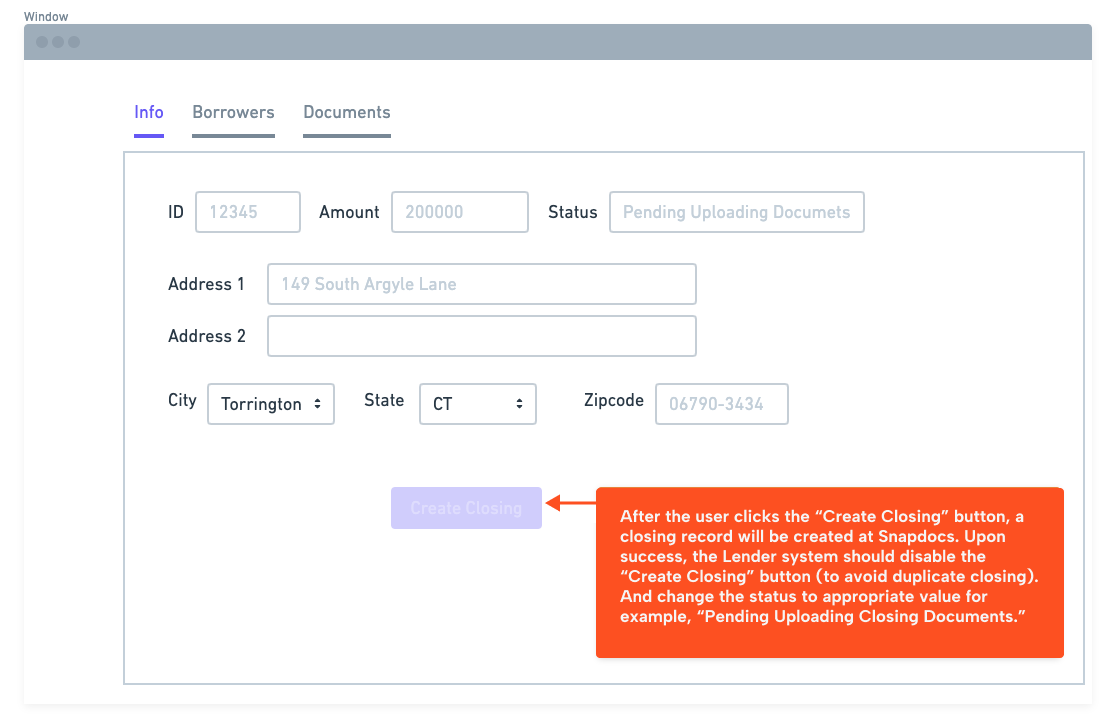
In the below example, the UI is automatically updated after a user submits the closing. It shows the closing status (Pending Uploading Documents), and the Create Closing button is no longer available.
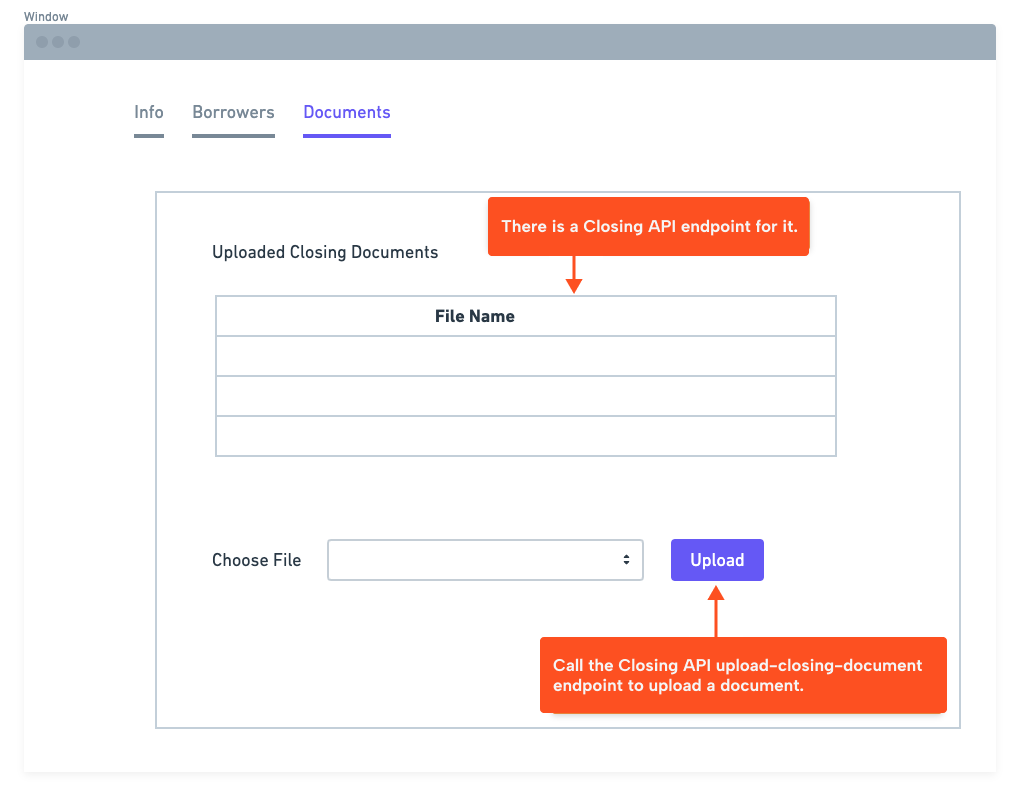
Upload documents
Provide a way for your loan officers to upload closing documents. The functionality makes a POST call to the documents endpoint with the unique closing_uuid. See the Upload a new document reference.
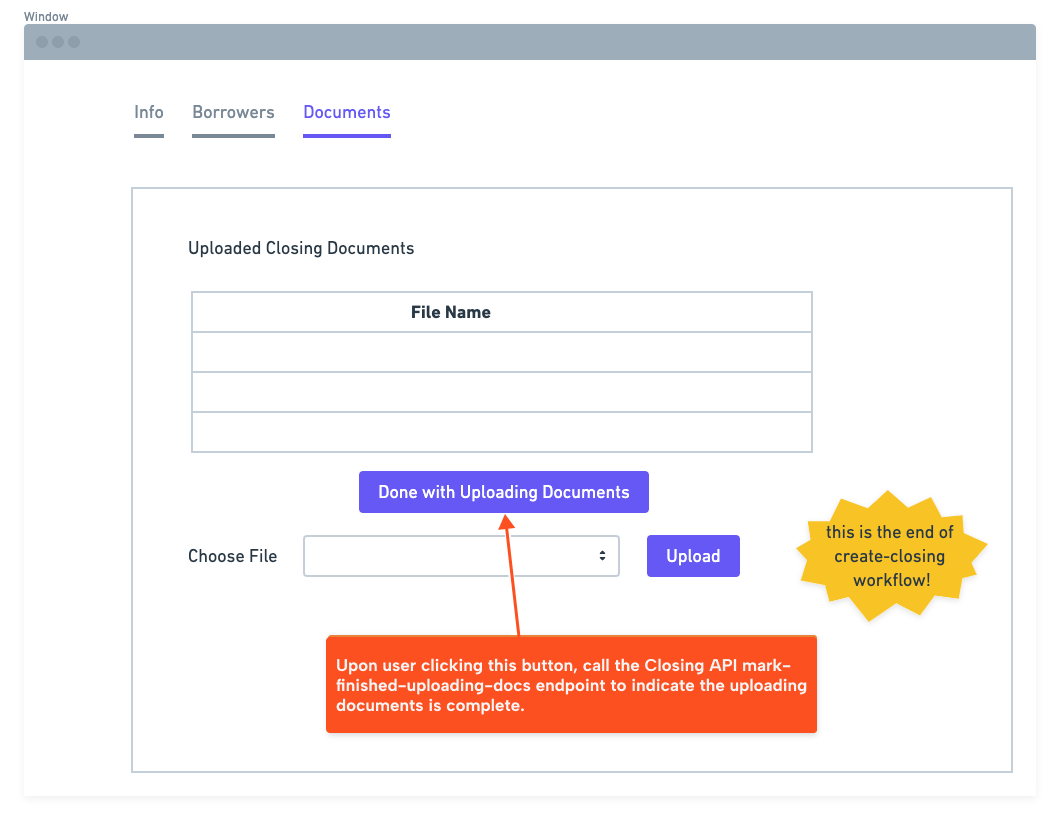
Mark "Document Upload" as complete
Snapdocs does not process the uploaded documents until the closing is marked ready. To do so, provide a way for your loan officer to mark the "document upload" task as complete. The functionality makes a PUT call to the api/v1/closings/{closing_uuid}/documents/submit endpoint. See the Submit documents endpoint reference.
Set up a webhook to the status updates and show the information in your UI. See more in the Subscriptions reference.
Below is a sample button that marks the closing ready and updates the status: